Peach Berry Layer Cake with Mascarpone Buttercream (low carb, gluten free)

cake1

You may have noticed all’s been a bit quiet here on the Western front. Over a year quiet. Well, of course, there’s an explanation. It mostly involves me resolving to finally conquer my fear of bats and going off to train in the high, misty mountains of Bhutan while studying the ancient, forbidden arts of the League of Shadows to confront injustice with my own personal vigilante streak.

HAHA. Just kidding. That’s Batman. (Even if you’ve never seen us in the same room.)

The real explanation is that no one on Earth is better at procrastinating than me, and that includes doing the things I actually like, such as running this blog.

Alright. I think we can move on from Excuse Central. Here is where I beg you to love me again by posting an absurdly over-the-top, excessive, entirely out of control cake recipe.

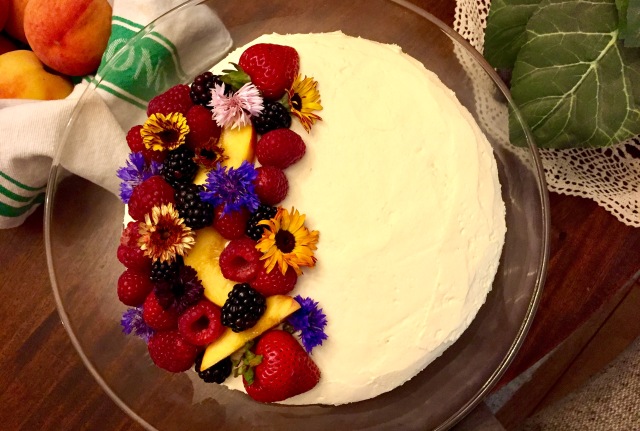
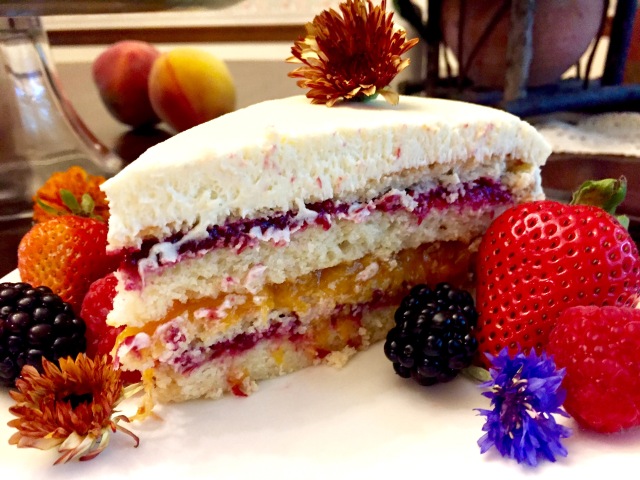
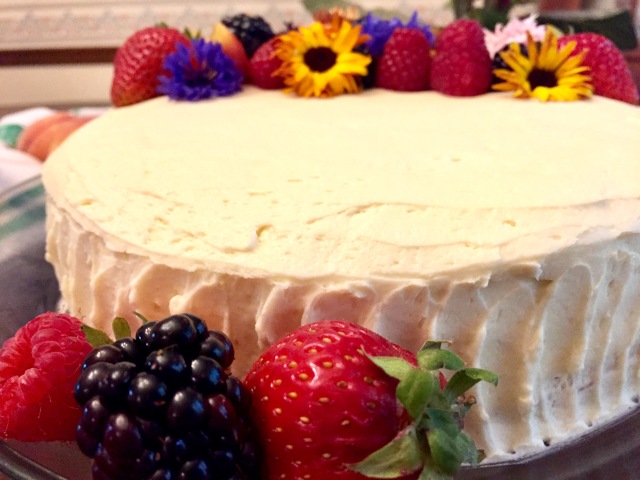
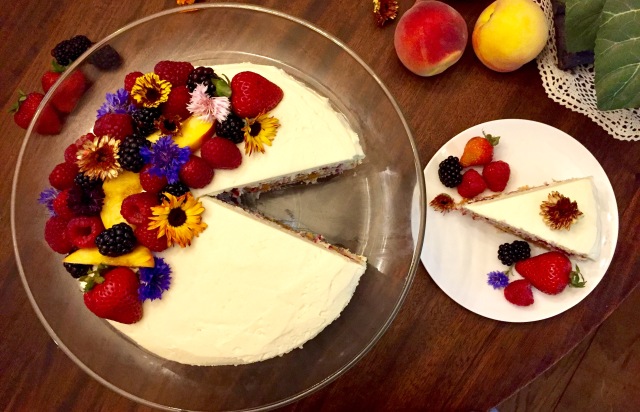
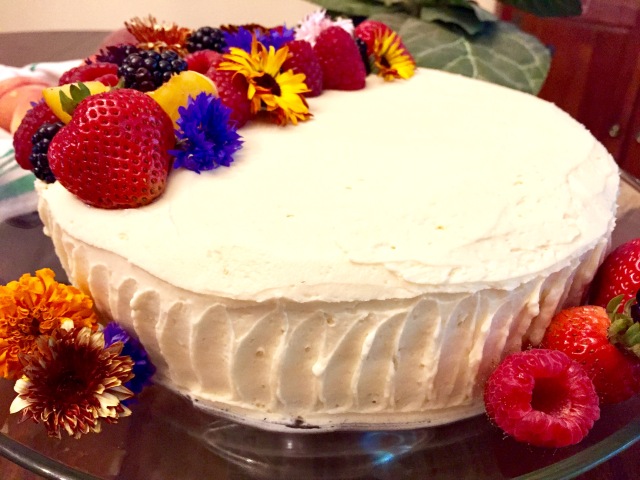
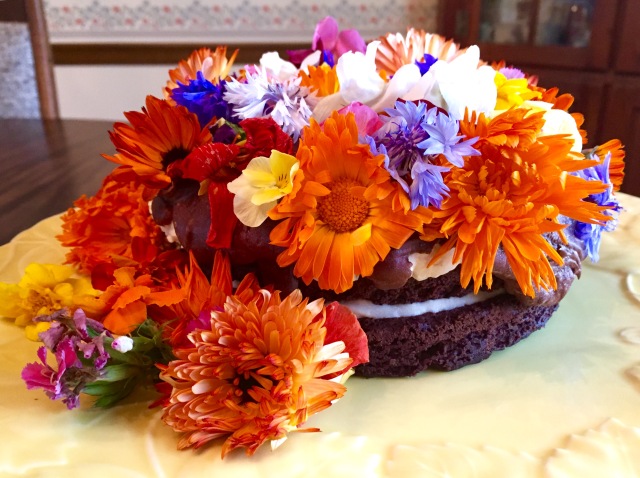
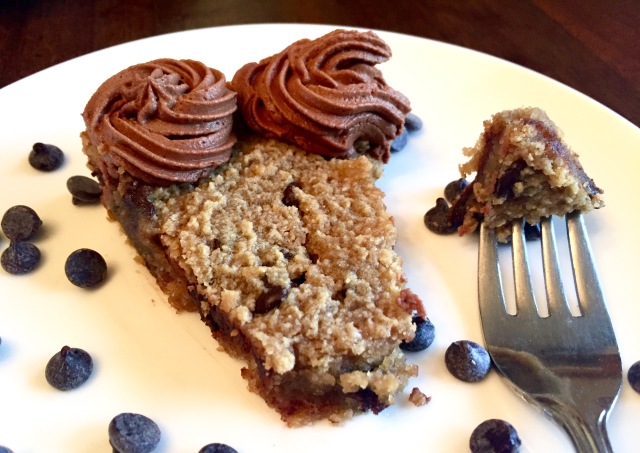
Meet…the Peach Berry Layer Cake with Mascarpone Buttercream. Yes.  I will win you back.

cake13

Sometimes, you just want to make a real crowd pleaser. A show stopper. A crowd…stopper. This is that.

This cake might have a lot of moving parts, but each step itself is fairly easy. Two different fruit compotes (peach and mixed berries) comprise the fillings of this white cake, while your basic buttercream serves as the frosting – just with the ravishing addition of mascarpone. If you haven’t tried mascarpone, it’s essentially the Italian cousin to cream cheese, with less tang. More cream than cheese. It’s the stuff in tiramisu.

cake11

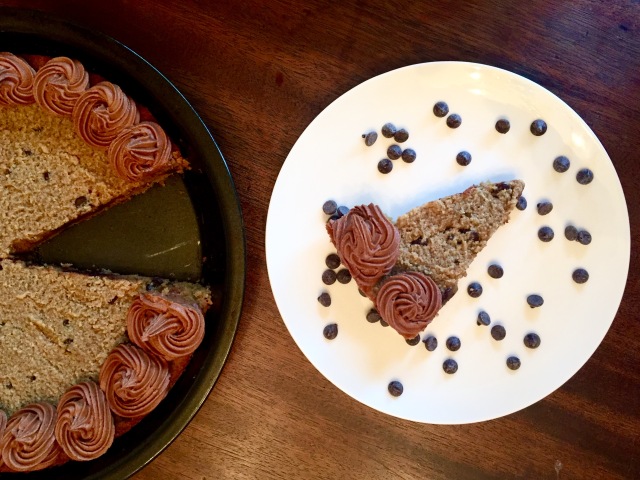
I also baked two separate layers and then cut them horizontally in half (like a torte) to make four layers total. Here’s a nifty little how-to from Crafty Baking with some great tips. If that sounds terrible and you don’t wanna level at all – don’t! Use however many fillings you want, or get creative with how you use ’em. You da boss.

ANYWAY. Creamy, colorful, and 100% ideal for summer, this is the cake you want to make and then also eat.

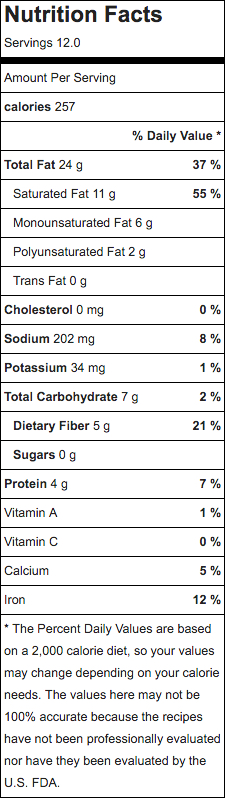
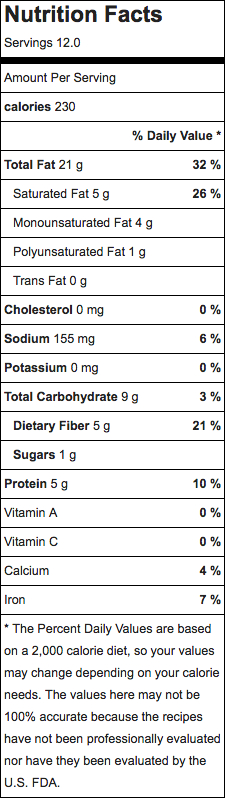
And before you even ask, of course it is low carb. Like, 5 net carbs per slice low carb. And gluten-free, for those ~so inclined~.  So go, my snackademics. Make. Eat.

cake7

Peach Berry Layer Cake with Mascarpone Buttercream (low carb, gluten free)

Yields: About 16 servings

Ingredients:

Compote fillings:
Mixed berry:
2 cups mixed berries of choice, fresh or frozen (I used raspberries, strawberries, and blackberries. And like four cherries because I had them.)
3 tbsp water
1 tbsp lemon juice
~3 tbsp sweetener
~ 1/2 tsp xanthan gum

Peach:
2 medium peaches, blanched/skin removed (instructions will be included below!)
3 tbsp water
1 tbsp lemon juice
~3 tbsp sweetener
~ 1/2 tsp xanthan gum

Cake:
3 cups almond flour
1/3 cup unflavored whey protein powder
2 tsp gluten-free baking powder
1/8 tsp salt
1/2 cup butter, softened
3/4 cup sweetener
3 large eggs or egg whites
1 tsp vanilla extract
1/2 cup almond, cashew or coconut milk, unsweetened

Frosting:
8 oz mascarpone, softened
2 sticks unsalted butter, softened
2-3 cups powdered sweetener
2 tsp vanilla extract
Extra fruit
, for garnish (optional)

Directions:
Preheat the oven to 325°F and lightly grease or spray two 9″ round baking pans. Cut out a circle of parchment paper and place on bottom of each pan.

Start with the compotes to give them more time to cool.

cake9

For the mixed berry, put all of the ingredients into a medium pan over medium heat, and cover. Bring the mixture to a boil and then turn the heat to med-low or low and let it simmer, uncovered, until some of the berries burst and the sauce has thickened – about 10-15 minutes. Before finishing, sprinkle with xanthan gum and whisk in vigorously. Let cool.

For the peach compote, first remove the skins from your two peaches. To do that, rinse the peaches, and then place in a pot of boiling water for about one minute. Use a slotted spoon to remove peaches and transfer into a colander. Run cold water over the peaches for a few seconds. The skin should come right off. Dice them up and then follow the exact same process as the berry compote above.

To make the cake, use a medium bowl to whisk together the almond flour, whey protein powder, baking powder and salt. In a large bowl, beat butter with sweetener until light and fluffy. Beat in vanilla extract and eggs or egg whites until well combined.

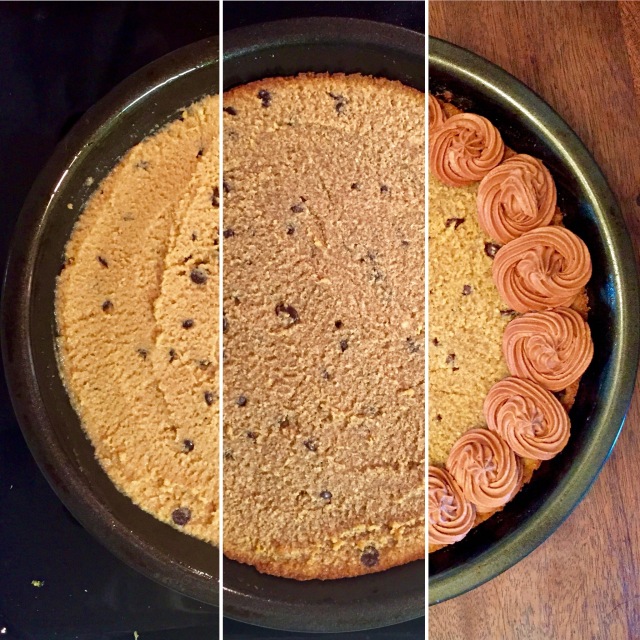
Beat in half of the almond flour mixture, then beat in almond/cashew/coconut milk. Beat in the remaining almond flour mixture until well combined. Spread batter in prepared baking pans. Bake 25 to 30 minutes or until golden brown and not wiggly in the middle. Cool completely.

To make the frosting,  add the softened mascarpone and butter to a large mixing bowl. Using an electric mixer beat until the mixture is light and fluffy.

cake4

Butter is the only thing that matters.

Add the powdered sweetener and vanilla extract. Beat another 2-4 minutes or until the frosting is light and fluffy.

cake2

Yes.

If cutting the cake layers in half, take the cooled cakes and follow the directions included here.

Place one cake layer on a serving plate or cake stand. Spread about half of the cooled mixed berry compote onto the layer, and then add another layer. Spread all of the peach compote on top. Add the next layer, spread on the remaining berry compote, and top with the last cake layer.

Frost the cake however you like. You may have some frosting left over – trust me, this is the opposite of a problem. Actually the only problem you’ll have is eating the last slice. THAT’S WHEN YOU MAKE IT AGAIN.

cake3

cake12

You know what to do.

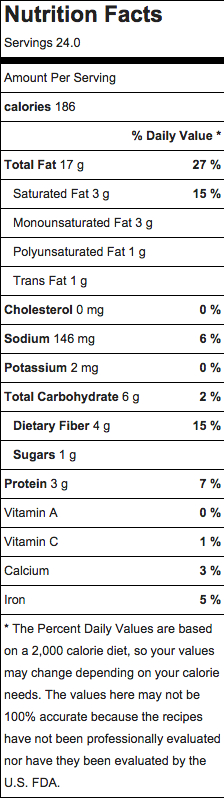
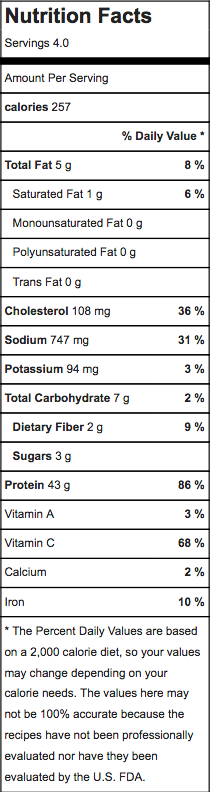
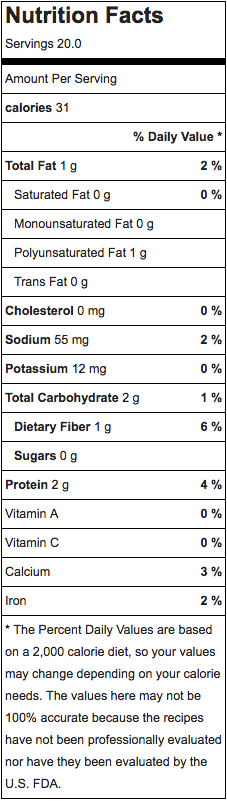
Nutrition (approximate):
mascarpone cake nutritition

Welcome to Snackademia.

Image-1

I, uh…hi!

After a hilariously long unexpected hiatus, it turns out some things were actually going on BEHIND THE SCENES. The M’Academia Nut is now…🌟Snackademia🌟 !!

You’ll see that name change reflected all over my social media too, which includes Instagram, Pinterest, and Twitter. (Facebook to come soon.) And an INCREDIBLE logo designed by my genius beautiful amazing friend Elizabeth. Thanks, Elizabeth!

And while some things may have changed, REST ASSURED you will still be presented with the finest of low-carb delicacies from this day forward. And that’s a promise.

Check this space for an epic grand reopening recipe with more to come! I’ve got lots planned for y’all. Hints have been presented above. 😘

And above all, thank you so much for coming back to see everything I want to share. Truly, you guys (…and cake) are the only things that keep me motivated.

🍰💞💕💖💕💞🍰

Easy Slow Cooker Apricot Chicken and Cauliflower Rice (low carb, gluten free, dairy free)

IMG_5551

There is a reason The United States of America is the greatest, best country God has ever given man on the face of the earth.

This is because I am FREE. Free to eat whatever cuisine I want on Independence Day. Because America. When your country is a delicious fondue melting pot, there are a lot of ways to be American. Burgers and apple pie notwithstanding.

Like most sentient creatures on earth, takeout food holds a special place in my heart. Sometimes I just wanna eat something kinda greasy and gross. This is a universal experience of the human condition. Probably sociologists talk about it a lot. Probably over some takeout.

apricotchicken7

My point here is that I could pretty much bathe in sweet and sour sauce. BUT I can think of more than a few reasons that might not be an excellent habit (…proper hygiene aside). The obscene amount of sodium, for one. Or the fact that one lunch-sized portion of your average sweet and sour chicken with rice contains about as many carbs as a liter of coke.

So that’s one thing. But takeout in and of itself isn’t a crime!! The problem is when everyone is super tired, and overworked, and in a rush, and trying to save money. This is when, justifiably, it’s a whooole lot easier to fall back on delivery, drive-thru, or pick-up for a quick meal that tastes pretty good. After while, takeout isn’t even fun anymore. It’s just dinner.

Ok I just depressed myself so IT’S TIME TO MOVE ON TO MY MAIN POINT HERE. Which is: Chinese takeout is the best and also super easy to make at home, HEALTHY STYLE. Plus, this recipe uses a slow cooker for those who 1) enjoy throwing everything into one pot and running away, and 2) laughing forever about turning on the oven when it’s a million degrees outside.

GOD BLESS ‘MURRICA.

apricotchicken8

Easy Slow Cooker Apricot Chicken and Cauliflower Rice (low carb, gluten free, dairy free)

Yields: About 4 servings

Ingredients:

Chicken and sauce:
Around 1 pound boneless skinless chicken breast
2 ⁄3 cup sugar-free or reduced sugar apricot preserves
3 tbsp gluten-free tamari or soy sauce (I used a low sodium tamari)
2 tbsp reduced sugar ketchup
1 tsp fresh minced ginger OR ¼ tsp ground ginger
¼ tsp liquid stevia OR about 1 tbsp lemon juice

Cauliflower rice:
Around 12 oz (1¼ cup) riced cauliflower (I seriously recommend grabbing a bag from Trader Joe’s if there’s one around you)
1-2 tbsp olive oil
Around 8 oz (1 cup) sliced mushroom
½ cup broccoli florets
1 tbsp gluten-free tamari or soy sauce (I used a low sodium tamari)
1-2 tbsp minced garlic, or to taste
¼ tsp ground ginger
Salt & pepper to taste
Diced green onions, for garnish (optional)

Directions:
Stir the preserves, tamari, ketchup, ginger and stevia or lemon juice in a small bowl. Whisk to combine. 

Place chicken breast in the crockpot and top with apricot sauce. Let cook for 4-5 hours on high or 8 hours on low. After cooking, open crockpot and shred chicken with two forks. Replace lid and let sit.

To make the cauliflower rice, place a large saucepan over medium heat and add the olive oil. Once the oil is hot, add minced garlic and heat until fragrant. Add mushrooms and sauté until they just begin to soften and release water. Add broccoli florets and cook until bright and crisp-tender, about 3 minutes.

Add riced cauliflower and sautee for a few minutes until more tender.

Add tamari, powdered ginger, black pepper, and salt. Stir to combine.

Serve them up together IN THE LAND OF THE FREE. 🇺🇸 🇺🇸 🇺🇸

Nutrition (Calculated with sugar-free preserves, lemon juice, and tamari):
apricot chicken w caulirice nutrition

Healthy Glazed Chocolate Donut Holes – With a Secret Ingredient! (low carb, gluten free, sugar free, dairy free, grain free)

donuthole17

IT ISN’T KALE. I repeat, the secret ingredient IS NOT KALE. I just wanted to put that out there first. We can all breathe easy now.

There’s something especially unappealing to me about the idea of “tricking” your family and friends into eating something healthy. When it comes to food, I am not into secrets. I think we already have enough creepy secrets about what’s in what we eat. No thank you, move along.

Because honestly? Healthy food can taste great. And the more we treat certain foods like they need to be a secret, the more people will assume they’re not worth eating without being disguised. You dig?

So in the interest of full disclosure, I shall reveal to you a fine example with my actually not that “secret” ingredient – CHIA SEEDS. In your chocolate cake donut holes. Because what’s the point in eating a healthy dessert if you can’t be openly smug about it to your peers? I swear this is not my main motivation for making healthy desserts. 

This isn’t the first time I’ve extolled the virtues of the mighty chia seed. I used them enthusiastically in my vanilla cinnamon chia seed pudding, for example. Often referred to as a ‘superfood’ (don’t we all just love that term), chia seeds boast an intimidating amount of nutritiousness:

  • Chia seeds are rich in polyunsaturated fats, especially omega-3 fatty acids. The omega-3s in chia seeds can help reduce inflammation, enhance cognitive performance and reduce high cholesterol.
  • Chia seeds are an excellent source of fiber, with a whopping 10 grams in only 2 tablespoons.
  • Chia seeds are rich in antioxidants that help protect the body from free radicals, aging and cancer. The high antioxidant profile also helps them have a long shelf life. They last almost two years without refrigeration.
  • Two tablespoons of chia seeds contain 18 percent of the DRI for calcium, 35 percent for phosphorus, 24 percent for magnesium and about 50 percent for manganese.
  • The outer layer of chia seeds swells when mixed with liquids to form a gel. This can used in place of eggs to lower cholesterol and increase the nutrient content of foods and baked goods. To make the egg replacement, mix 1 tablespoon of chia seeds with 3 tablespoons of water and let sit for 15 minutes.
  •  Chia seeds can play an important role in regulating insulin levels. They can reduce insulin resistance and decrease abnormally high levels of insulin in the blood. (healthyeating.sfgate.com)

Also: Chia Pets. Never forget. 

Because chia seeds are capable of absorbing up to 10-12 times their weight in liquid, your batter will develop a thick, almost gel-like texture the longer it sits. This is ok. They all bake up the same! As in, PERFECTLY.

It was entirely by accident that I discovered the texture of ground chia seed provided the perfect texture and mouthfeel for a Dunkin’ Donuts Munchkin. The fluffy air pockets, the slight crunch of the glaze giving way into the crumbly, cakey inside. Wait, where were we?

OH YES. You, making these, and feeling great about it. ALLOW ME TO ENABLE YOU:

IMG_6255

Healthy Glazed Chocolate Donut Holes – With a Secret Ingredient (low carb, gluten free, sugar free, dairy free, grain free)

Yields: About 20-22 donut holes

Ingredients:

Donut Holes:
¾ cup sweetener
¼ cup milled/ground chia seeds (if grinding whole seeds, use about 2 heaping tbsp)
½ cup unsweetened cocoa powder
1 tsp baking powder
¼ tsp sea salt
3 egg whites, or about 1/3 cup egg white
1 tsp vanilla extract

Glaze:
1 ½ cups powdered sweetener
3 to 4 tablespoons unsweetened almond milk or water
1 tsp vanilla extract

Directions:

Preheat the oven to 350°F and lightly grease or spray a cake pop mold/donut hole/muffin tin.

In a large bowl, combine all of the ingredients, and mix well to create a batter. Reminder: The longer you let your batter sit, the thicker it gels. Not a problem! Spoon batter into prepared tin, almost to the top.

Bake 20-25 minutes, or until an inserted toothpick comes out clean.

To make glaze, whisk powdered sweetener, almond milk or water, and vanilla extract until smooth. If you prefer a thinner glaze, add in more milk or water one teaspoon at a time until desired consistency is reached.

Allow the donut holes to cool slightly. Place a cooling rack atop a baking sheet, and dip each donut hole into the glaze. Cover all sides with glaze and lift using a fork, tapping off excess glaze.

Transfer donut holes to the rack to allow any more extra glaze to drip off. Let glaze set, about 30 minutes to an hour.

Nutritional Info (As calculated for 20 servings, using water in glaze):

donut holes nutrition


Snickerdoodle Cheesecake Bars (low carb, gluten free, no added sugar)

snickerdoodlecheesecake13

When inspiration hits, it’s a lot like getting hit by a truck. Ignoring it is incredibly difficult.

A totally hypothetical example: seeing some “snickerdoodle sandwich cookies with cream cheese frosting” on sale and then thinking of how great that sounds for three days straight.

Outside of this totally hypothetical example, we all know how I feel about cookies. (TL;DR: High. Maintenance.) But the flavor combination was irresistible. Anything cinnamonAnything cream cheese. But cookies? No. Life is too short for that.

And this is where the Truck of Inspiration™ came hurtling merrily down the Snackademia highway. Cheesecake bars. Of course. Bars are my everything. I would make everything into a bar version if I could (AND I HAVE). THE ANSWER WAS CLEAR. We were making snickerdoodle cheesecake bars.

snickerdoodlecheesecake14

But this brought about its own set of challenges. I was immediately imagining a graham cracker crust. This does not fit very neatly into a low-carb or grain-free diet. Then the Truck of Inspiration™ made an entirely legal U-Turn and came back around at top speed.

PECANSWhether you pronounce them “pee-can” or “puh-kahn”, we can all agree that (second only to the macadamia), the pecan is a superior nut:

With a little cinnamon and nutmeg, you’ve got yourself the perfect graham cracker crust analogue. No need for butter with the natural oils in the pecans providing all the binding power. And how could we forget the sweet, crunchy cinnamon “sugar” topping, so crucial to the snickerdoodle experience?? We could not.

So now the problem is that I ate all of these already and I’ve been thinking of making them again for three days straight. I don’t need inspiration for that one. Maybe I need the Truck of Distraction™.

Snickerdoodle Cheesecake Bars (low carb, gluten free, no added sugar)

Recipe adapted from Shugary Sweets

Yields: Around 24 – 30 bars

Ingredients:

Crust:
2 1/2 cups pecans
2 tbsp granulated sweetener, OR 1 tbsp granulated sweetener plus 1 tbsp sugar free brown sugar substitute
1 tsp cinnamon
1/4 tsp nutmeg

Filling:
2 8 oz packages cream cheese (I used neufchâtel), softened
3/4 cup granulated sweetener, OR 2/3 cup granulated sweetener plus 2 tbsp sugar free brown sugar substitute
2 egg whites, or around 1/4 cup egg whites
1 tsp vanilla extract
1/4 butterscotch or molasses extract, optional
1/2 tsp cinnamon

Topping:
1/4 cup granulated sweetener
1 tsp cinnamon

Directions:

Preheat oven to 350°F and grease a 9×13 inch baking pan.

To make crust, place pecans, spices, and sweetener into a food processor or high-speed blender and process until pecans form a crumbly mixture that begins to ball and stick together (make sure to stop before you’ve made pecan butter!).

snickerdoodlecheesecake8
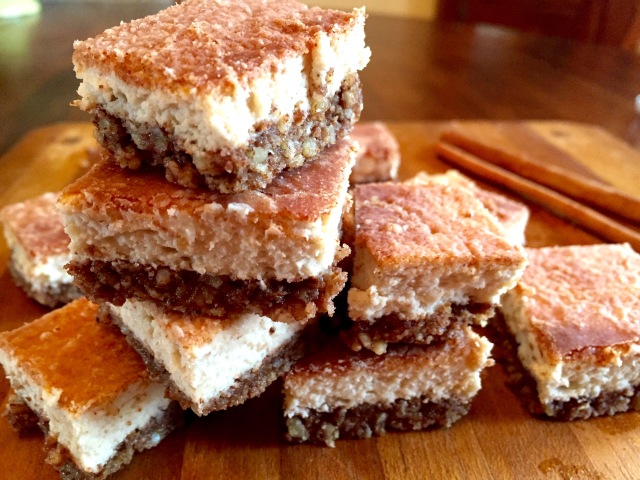
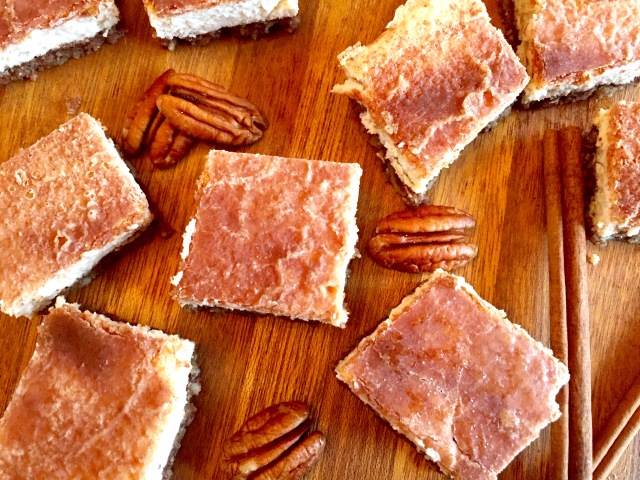
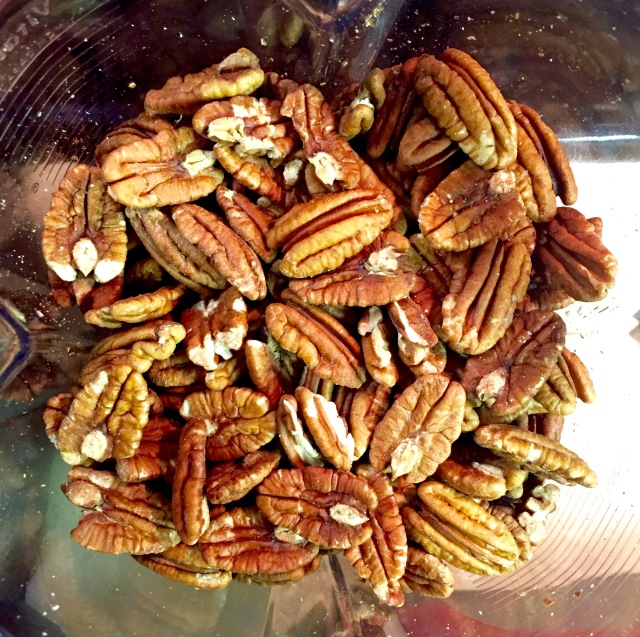
Ugh I love pecans so much.

Press crust into the greased 9×13 baking pan and par-bake for about 8-10 minutes.

For the filling, beat cream cheese with sweetener, egg whites, vanilla, butterscotch or molasses extracts (if using), and cinnamon using the whisk attachment of an electric mixer. Beat for a few minutes until fluffy and smooth. Pour over pecan crust and smooth with a spatula.


In a small bowl, combine sweetener and cinnamon for topping. Sprinkle generously over the cheesecake layer.

Bake for 28-30 minutes, or until topping has browned and filling jiggles only slightly. Once cooled, refrigerate until completely set and cut into squares. Keep any (unlikely) leftovers in the fridge.

IMG_5647ALL HAIL THE TRUCK OF INSPIRATION™

Nutritional Info (Calculated for 26 servings):

snickerdoodle cheesecake nutrition

Fudgy Ganache Layer Cake with Vanilla Buttercream Frosting (low carb, gluten free, sugar free, dairy free)

flowercake1

Every year I seem to hold some kind of unspoken competition with myself to make the richest, most decadent birthday cake on earth. Each year has gotten successively richer, and more decadent, and this year has been the most ridiculous yet. I am actually concerned. I have no idea how to top this thing. Next year I might just chug a pint of heavy whipping cream and call it a day.

This is a tour de force. It’s like eating a brick of fudge. I could build a delicious house with this cake. A delicious NEIGHBORHOOD. There are THREE LAYERS EACH OF FUDGE CAKE AND DARK CHOCOLATE GANACHE ALONE. NOT TO MENTION THE BUTTERCREAM?? JUST LOOK AT IT.

flowercake10

ARE YOU SEEING THIS.

This is the cake your mother warned you about.

Luckily, I am here to hold your hand through everything. I even tried to temper the intensity of this confection for more delicate sensibilities by arranging actual edible flowers on top. You are not obligated to do this, but just be warned that without them, you’ll be slammed in the face with the full magnitude of this chocolate monsterpiece. It takes no prisoners. 

This recipe was written for a three layer 6″ cake instead of the more traditional 9″ rounds because trust me, it’s enough. You are however totally free to make two slightly thicker 6″ rounds, or even one 9″ round. Whatever floats your boat!

You know what else oughta float your boat? The fact that this magnificent creation is low carb, gluten free, dairy free, and contains no added sugar. You could do worse.  

flowercake2

Fudgy Ganache Layer Cake with Vanilla Buttercream Frosting (low carb, gluten free, no sugar added, dairy free)

Yields: Around 10-12 servings

Cake recipe adapted from Gourmet Girl Cooks

Ingredients: 

Cake
2/3 cup butter, coconut oil, or dairy-free spread, melted
½ cup unsweetened cocoa powder
1 to 1¼ cups powdered sweetener
¼ tsp sea salt
1½ tsp liquid stevia
½ tsp vanilla extract
3 large egg whites, or about 1/3 cup egg whites

Ganache
6 to 8 oz good quality sugar free chocolate
6 to 8 oz heavy whipping cream or unsweetened almond milk (8 oz. = 1 cup)
½ tsp vanilla extract

Vanilla Buttercream Frosting
½ cup butter or dairy-free spread, softened
2 – 2 ½ cups powdered sweetener
½ tsp vanilla extract
2 tbsp almond milk or heavy whipping cream

Directions:
Preheat the oven to 325° and grease two or three 6″ round (or one 9″) cake pans. Cut out a circle of parchment paper and place on bottom of each pan. I’m serious, don’t skip this.

To make cake, use a large bowl to combine melted butter (or coconut oil or dairy-free spread), cocoa powder, powdered sweetener and salt. Mix until well combined.

Stir in stevia and vanilla. Add egg whites one at a time, beating briskly after each addition until batter is glossy and smooth. Spread batter evenly in prepared pans using a spatula. Bake for 20 to 30 minutes (depending on how thick each layer is) or until a toothpick inserted in center comes out mostly clean. Let cool completely in pan before flipping out onto a cooling rack or cake stand.

To make buttercream frosting, beat softened butter or dairy-free spread and powdered sweetener until well combined and smooth.

Add vanilla extract and unsweetened almond milk or cream and beat until fully incorporated, adding more if needed for spreading consistency. Keep refrigerated until ready to pipe or spread onto cooled cake.

To make chocolate ganache, coarsely chop chocolate with a serrated knife, and then transfer to a heatproof bowl. You can now either bring the cream or almond milk to just a boil over medium-high heat (don’t let it boil over!), or heat it in the microwave. Pour over the chopped chocolate and let stand for 5 to 10 minutes to allow it to melt the chocolate. Whisk together until smooth and shiny.

For an even lazier ganache, microwave the chopped chocolate and heavy cream or almond milk together, 30 seconds at a time. Let it sit for a minute, and then whisk away (I may have used this method).

NOW FOR MY FAVORITE PART. The layering. Place first cooled cake layer onto a cake plate and use the refrigerated buttercream to create a buttercream dam, piping around the edge. Pictured below:

See what I did there? The dam helps to keep the ganache from oozing out. This is my new favorite thing.

Continue this until the final layer, spreading top with remaining buttercream. Pour on the remaining ganache, which will be slightly thickened. If you’re extra fancy, add some ~*~organic edible flowers~*~ on top. Enjoy, and let every bite take you on a journey. 

Nutritional Info (Calculated for 12 servings, with dairy-free spread and unsweetened almond milk):

 flower cake nutrition

Chocolate Chip Cookie Pie With Fluffy Chocolate Buttercream Frosting (low carb, gluten free, dairy free, no added sugar)


Ok, so technically another cookie recipe – WAIT I CAN EXPLAIN. While I have consistently maintained that cookies (PLURAL) are a tedious, high-maintenance endeavor, this is not the case when we are dealing with one gigantic cookie (SINGULAR).

LAZY LOOPHOLES.

More specifically, we’re talking about a cookie pie. Because pies are a…spring thing? (Are they?) And it’s spring now…?

You know what, no one was asking why. The why is obvious. Chocolate chip cookie pie. That is why. Also: fluffy whipped chocolate buttercream, because I have a whisk and am prepared to use it at all times.

IMG_6408

Because you are all subject to my personal whims, I aimed for my ideal cookie texture – dense, gooey, just this side of underbaked. I succeeded. Giddy with triumph, I decided that the only way this could be any better was with more chocolate. This would explain the buttercream.

Now if you know me, and I think you know me, things just keep GETTIN’ BETTERThis frosting-trimmed-chocolate-studded ~*~dream pie~*~ won’t be spiking any blood sugars or providing your daily dose of completely unnecessary trans fats.  That is not how we do things around here. What we do is the good things minus the bad things. It’s basic math. Look, I didn’t make the rules, Pythagoras.


cookiepie2

In this case, that means swapping out the carbs, glutens, and sugars for healthier alternatives, and losing none of the unbridled joy one experiences when eating a giant cookie. Pie. A giant cookie pie.

LET US WASTE NO MORE TIME.

cookiepie4

Chocolate Chip Cookie Pie With Fluffy Chocolate Buttercream Frosting (low carb, gluten free, dairy free, no added sugar)

Recipe adapted from Cafe Delites

Yields: Around 10-12 servings

Ingredients:

Cookie:
1/2 cup butter or dairy-free spread, softened
6 tbsp granulated sweetener, OR 1/4 cup granulated sweetener plus 2 tbsp sugar free brown sugar substitute
1 egg white, or three tbsp egg whites
1 tsp vanilla extract
2 cups almond flour
1/4 teaspoon sea salt
1/3 cup sugar free chocolate chips

Chocolate Buttercream:
1 cup powdered sweetener (or more if needed)
1/4 tbsp unsweetened cocoa powder
1/4 cup butter or dairy-free spread, softened 
1-2 tbsp unsweetened almond milk
1 tsp vanilla extract
1/8 teaspoon sea salt

Instructions:

Preheat the oven to 350° and grease a 9″ pie pan.

In a large bowl, cream together softened butter and powdered sweetener. Add in the egg white, vanilla, almond flour, and salt and continue mixing until throughly combined.

Fold in chocolate chips, and then transfer to pie pan, smoothing with a spatula. Bake for 24-28 minutes, or until edges begin to brown and a toothpick inserted into the center comes out clean (or mostly clean, if you prefer it a bit underbaked).

IMG_6411

To make the buttercream frosting, combine the powdered sweetener and cocoa powder. Beat the butter or dairy-free spread on medium speed until smooth and creamy.

Gradually add the sweetener/cocoa powder mixture with the almond milk. Stir in vanilla and salt, mixing again until smooth.

Decorate the cooled cookie pie with frosting however you please!

Nutritional Info (As calculated with dairy-free spread and brown sugar substitute):

chocolate chip cookie pie nutrition

Roasted Eggplant Lasagna (low carb, gluten free, vegetarian)

Is there anything more delightful than an eggplant? THAT WAS A TRICK QUESTION. Because the answer is yesroasted eggplant, which is in fact marginally more delightful than just regular eggplant.

For those who require examples of the aforementioned delight: baba ganoush, ratatouille, stir fry, moussaka – the (delightful) possibilities are simply endless for this glossy, purple fruit! It also boasts an impressive array of many vitamins and minerals, such as excellent amounts of fiber, folate, potassium and manganese, as well as vitamins C, K, and B6, phosphorus, copper, thiamin, niacin, and magnesium. It even contains phytonutrients with high antioxidant compounds.

But let’s not kid ourselves. What’s the first thing you think of when you think of eggplant dishes? That’s right. This fine aubergine is usually just relegated to second fiddle in an eggplant parmesan – breaded, fried, and reduced to mush under a mountain of sauce and cheese.

Now, I won’t even lie. I am entirely ok with the mountain of sauce and cheese. So let’s work on everything else.

AS PROMISED: mountains of sauce and cheese.

Baked, grilled, roasted – nothing brings out the ~*~rich complexity~*~ in an eggplant’s flavor than some lovin’ in the oven (…or grill). Plus, with its dense, robust texture, it makes an excellent substitute for meat in vegetarian or vegan cuisine.

So let’s keep it classic. We want sauce, we want cheese, and we want eggplant playing a better role than ‘breadcrumb vehicle’. Here’s an idea: ROASTED EGGPLANT LASAGNA (this is where you get excited because I said just the title of the movie post). Now it’s low carb, gluten free, and still accessible to our vegetarian friends!!

eggplant17

Roasted Eggplant Lasagna (low carb, gluten free, vegetarian)

Yields: Around 8 servings

Ingredients:

3-4 medium to large eggplants
Olive oil spray AND/OR about 3 tbsp olive oil
Salt and pepper, seasonings of choice (I used Penzeys Italian Herb Mix, which includes oregano, basil, marjoram, thyme and rosemary)
1 can (14.5 oz.) diced tomatoes (I used a ‘no salt added’ variety)
1 16 oz. jar no sugar added tomato sauce
1/2 cup grated parmesan
2 to 2 1/2 cups shredded mozzarella (I used part-skim mozzarella)
Chopped parsley, for topping

Directions:

Preheat the oven to 400º, and line a large baking sheet (or sheets) with aluminum foil. Spray or drizzle with olive oil.

Slice eggplant and lay on baking sheet(s) in a single layer. Lightly salt and season, and spray, brush, or drizzle with olive oil again.

Place in oven and roast for 30 – 45 minutes, flipping each slice over about halfway through. (NOTE: if some slices are thinner than others, they may brown and crisp up – these make AWESOME eggplant chips and are excellent for snacking on. NO MISTAKES HERE.)

While eggplant roasts, pour the diced tomatoes into a colander placed in the sink, and allow to drain.

Spread about 1/4 cup tomato sauce evenly over the bottom of a large casserole dish. Layer with roasted eggplant, and then top with the drained diced tomatoes. Sprinkle about 2 tbsp parmesan and 1/2 cup of mozzarella, and then continue layering with eggplant, tomato sauce, and cheeses until eggplant runs out. Make sure you finish with a glorious layer of mozzarella and parmesan!

Bake about 30-40 minutes, or until cheese melts and begins to brown. Top with fresh chopped parsley, and serve hot.

eggplant7eggplant8

Nutritional Info (as calculated with olive oil spray):

roasted eggplant nutrition


“Nutella” Cupcakes (Low carb, no sugar added, gluten free, dairy free)

nutellacupcakes7

Here is why America is the greatest country on Earth: Nutella.

I know. You’re thinking, “Nutella is an Italian product.” Ok, yes, smartypants, but this isn’t about origin. It’s about availability. And while European markets may be rife with Nutella delights, so are American ones. But it gets better: we also have peanut butter, speculoos spread, and even products SWIRLED WITH MORE THAN ONE. Europe, step YOUR GAME UP. (disclaimer: I still love Europe.)

We have all of these spreads available in spades. You know when even Jif is trying to get in on the chocolatey hazelnut action, it’s hit the mainstream.

And yet, in a sea of variety and choice, I was still left completely deprived in the Nutella department. True tragedy: the very first ingredient in Nutella is sugar. Great. Sure, there are loads of excellent recipes available to make your own, but sometimes you want to be able to just buy something instead of exhausting all that effort. HAZELNUTS DON’T BLANCH THEMSELVES, YOU KNOW.

So, essentially: water, water, everywhere, and not a drop to drink. 

This is why I openly wept with joy when Go Lo Foods sent me a few samples of their Sugar Free Dark Hazelnut Spread With Cocoa. Sweetened with erythritol (my sweetener of choice!), it literally says “100% less sugar than Nutella” on the packaging. Yes. 

IMG_6051
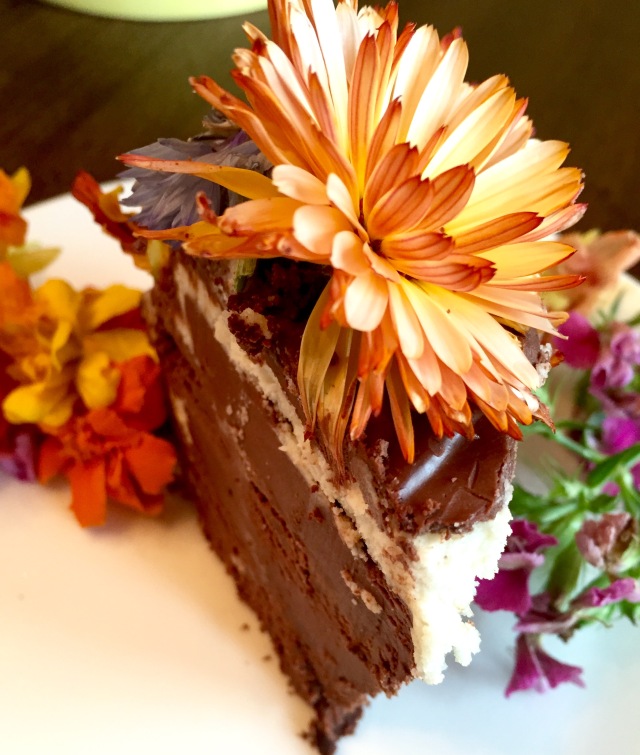
Read it and weep (with joy).

Straight off the spoon, this spread provides a mellow, dark chocolatey hazelnut flavor without the cloying sweetness of so many other spreads. With a bag of hazelnut flour, some sugar free dark hazelnut spread, and a dream, I knew what I had to do. I had to stop eating the samples long enough to make nutella cupcakes. 

I opted for a simple vanilla buttercream to let the hazelnutty chocolate goodness be the real star of the show. One bite of these brought me to my knees. I am actually still on my knees. It has been very uncomfortable to type this.

So come join me on the floor and whip up a batch of these today! Thanks, Go Lo Foods!

“Nutella” Cupcakes (Low carb, no added sugar, gluten free, dairy free)

Cupcake recipe adapted from Keto Adapted 

Yields: About 12 regular cupcakes, or 24 mini cupcakes

Ingredients: 

Cupcakes:
2 cups hazelnut or almond flour
¼ cup unsweetened cocoa powder
½ tsp baking soda
1/8 tsp sea salt
2 egg whites, or about 1/3 cup egg whites
½ cup unsweetened almond milk
½ cup granulated sweetener
1 ½ tsp vanilla extract
1/8 tsp liquid stevia, optional

Vanilla Buttercream Frosting
½ cup butter or dairy-free spread, softened
2 – 2 ½ cups powdered sweetener
½ tsp vanilla extract
1 tbsp almond milk or heavy whipping cream
¼ cup Go Lo Foods Sugar Free Dark Hazelnut Spread With Cocoa

Directions:

Preheat oven to 350°F and line cupcake/muffin pan with cupcake liners.

In a large bowl, combine the hazelnut or almond flour, cocoa powder, salt, and baking soda. In a medium bowl, combine almond milk, egg whites, sweetener, stevia, and vanilla extract.

Stir the wet ingredients into the hazelnut or almond flour mixture until thoroughly combined. Spoon the batter into the liners, about 2/3rds full.

For regular-sized cupcakes, bake 18-25 minutes (around 12-18 minutes for mini, but keep an eye on them), until a toothpick inserted into the center of the cake comes out clean.

nutellacupcakes11

To make buttercream frosting, beat softened butter or dairy-free spread and powdered sweetener until well combined and smooth.

Add vanilla extract and unsweetened almond milk or cream and beat until fully incorporated, adding more if needed for spreading consistency.

Spoon or pipe onto cooled cupcakes.

For topping, spoon or pipe dark chocolate hazelnut spread on top of vanilla buttercream in swirls or melt slightly and drizzle over frosting. Enjoy!!

nutellacupcakes3

Nutritional Info (Calculated for 12 regular-sized cupcakes, with hazelnut flour and dairy-free spread):

nutella cupcake nutrition 

Disclosure: I was not compensated for this post, however I did receive a sample for my review. All opinions expressed are purely my own and not influenced in any way.

Classic Hamantaschen (low carb, gluten free, no added sugar, dairy free)

hamantaschen10

With all the accidental Lenten festivities going on last week, it only seemed right to include some other theological treats in the fun. And with Purim right around the corner, what better than a makeover of the classic hamantaschen cookie?

Purim is a Jewish holiday that commemorates the saving of the Jewish people from Haman, a huge jerk that planned to murder all of them because he didn’t like one guy in particular. Hamantaschen are a traditional filled pastry folded into a triangle, generally thought to be referencing Haman’s three-pointed hat. Eating the hat of your enemies: APPROVED.

Now I have seen recipes for hamantaschen that put this one to shame – red velvet, brownie-filled, funfetti-cheesecake hamantaschen – but what’s the hurry? Build up to those, I say. Let’s start with the classics.

Well, classically, hamantaschen are filled with a variety of sweet fillings, like poppy seed (the oldest and most traditional variety), apricot, raspberry, raisins, fruit preserves, cherry, fig, chocolate, or even caramel or cheese.

Being a cheap lady of distinguished taste and discretion, I opted for apricot and raspberry as my fillings of choice, also because I already had a jar of each. (But THAT was because those two are the best fillings for anything, so really it all comes full circle.)

hamantaschen14

I acknowledge that for someone who hates making cookies as much as I do, I am doing an EXCELLENT job at finding recipes to make them at every opportunity. That being said, these are pretty painless in terms of effort, even though they look so fancy. I promise! I’ve included pictures on how to fold them and everything!

With some simple substitutions for flour and sweetener, it was almost TOO easy to create an authentic hamantaschen minus all the wheaty-ness, sugary-ness, and gluten…ness. Plus, this is a cultural learning experience! This way, we all win.

Come, let us nosh.

Classic Hamantaschen (low carb, gluten free, no added sugar, dairy free)

Recipe adapted from All Day I Dream About Food

Yields: About 15 cookies

Ingredients:

2 cups almond flour
1/4 cup sweetener
1/4 tsp salt
1 large egg white, or about 2-3 tbsp egg white
2 1/2 tbsp butter or dairy-free spread, melted
1/2 tsp vanilla extract
1/8 tsp stevia extract
1/4 cup sugar-free or reduced sugar raspberry preserves
1/4 cup sugar-free or reduced sugar apricot preserves

Instructions:

Preheat the oven to 325°F and line a large baking sheet with parchment paper.

Combine almond flour, sweetener, and salt in a medium bowl. Add egg white, vanilla and stevia extracts, and melted butter or dairy-free spread, and stir until dough comes together.

Always make a tiny version of the thing you are making when the opportunity presents itself.

Roll out dough onto a large piece of parchment paper. Using another large piece of parchment on top, roll out to 1/8 inch thick. Cut out rounds using (no smaller than) a 3 inch round cookie cutter.

Using a spatula or knife, very gently loosen rounds from parchment and transfer to prepared baking sheet.

Re-roll dough and cut out more rounds as necessary, until dough runs out. Spoon about 3/4 tsp of either raspberry or apricot preserves into the center of each circle.

Fold the dough in from three sides and firmly pinch the corners. The dough will be delicate, so don’t worry if you find yourself patching up little tears and cracks along the way.

Bake 12 to 15 minutes, until edges are just golden brown. Remove and let cool completely before attempting to transfer to any other plate/dish. Nosh away!

Nutritional Info (Calculated with dairy-free spread and sugar-free preserves):

hamantaschen nutrition